> ## Documentation Index
> Fetch the complete documentation index at: https://docs.tokensmind.ai/llms.txt
> Use this file to discover all available pages before exploring further.
# OpenAI Codex
> 通过 Tokensmind API 使用 Codex
## 安装
### 官网下载(macOS 版本)
[https://openai.com/zh-Hans-CN/codex/](https://openai.com/zh-Hans-CN/codex/)
### 使用命令行安装
```bash theme={null} theme={null}
npm install -g @openai/codex
```
## **环境变量配置**
### 使用配置文件配置
1. 修改 ` ~/.codex/config.toml` 配置文件,增加如下配置:
```toml theme={null} theme={null}
profile = "Tokensmind"
[model_providers.Tokensmind]
name = "Tokensmind"
base_url = "https://tokensmind.ai/v1"
personality = "pragmatic"
wire_api = "responses"
[profiles.Tokensmind]
model = "gpt-5.2"
model_provider = "Tokensmind"
model_reasoning_effort = "high"
```
2. 修改 ` ~/.codex/auth.json` 配置文件,修改如下配置:
```json theme={null} theme={null}
{
"OPENAI_API_KEY": "Tokensmind_API_KEY"
}
```
### 通过 cc-switch 配置
1. 运行 CC-Switch,添加供应商。
 2. 在预设列表中选择「Tokensmind」。
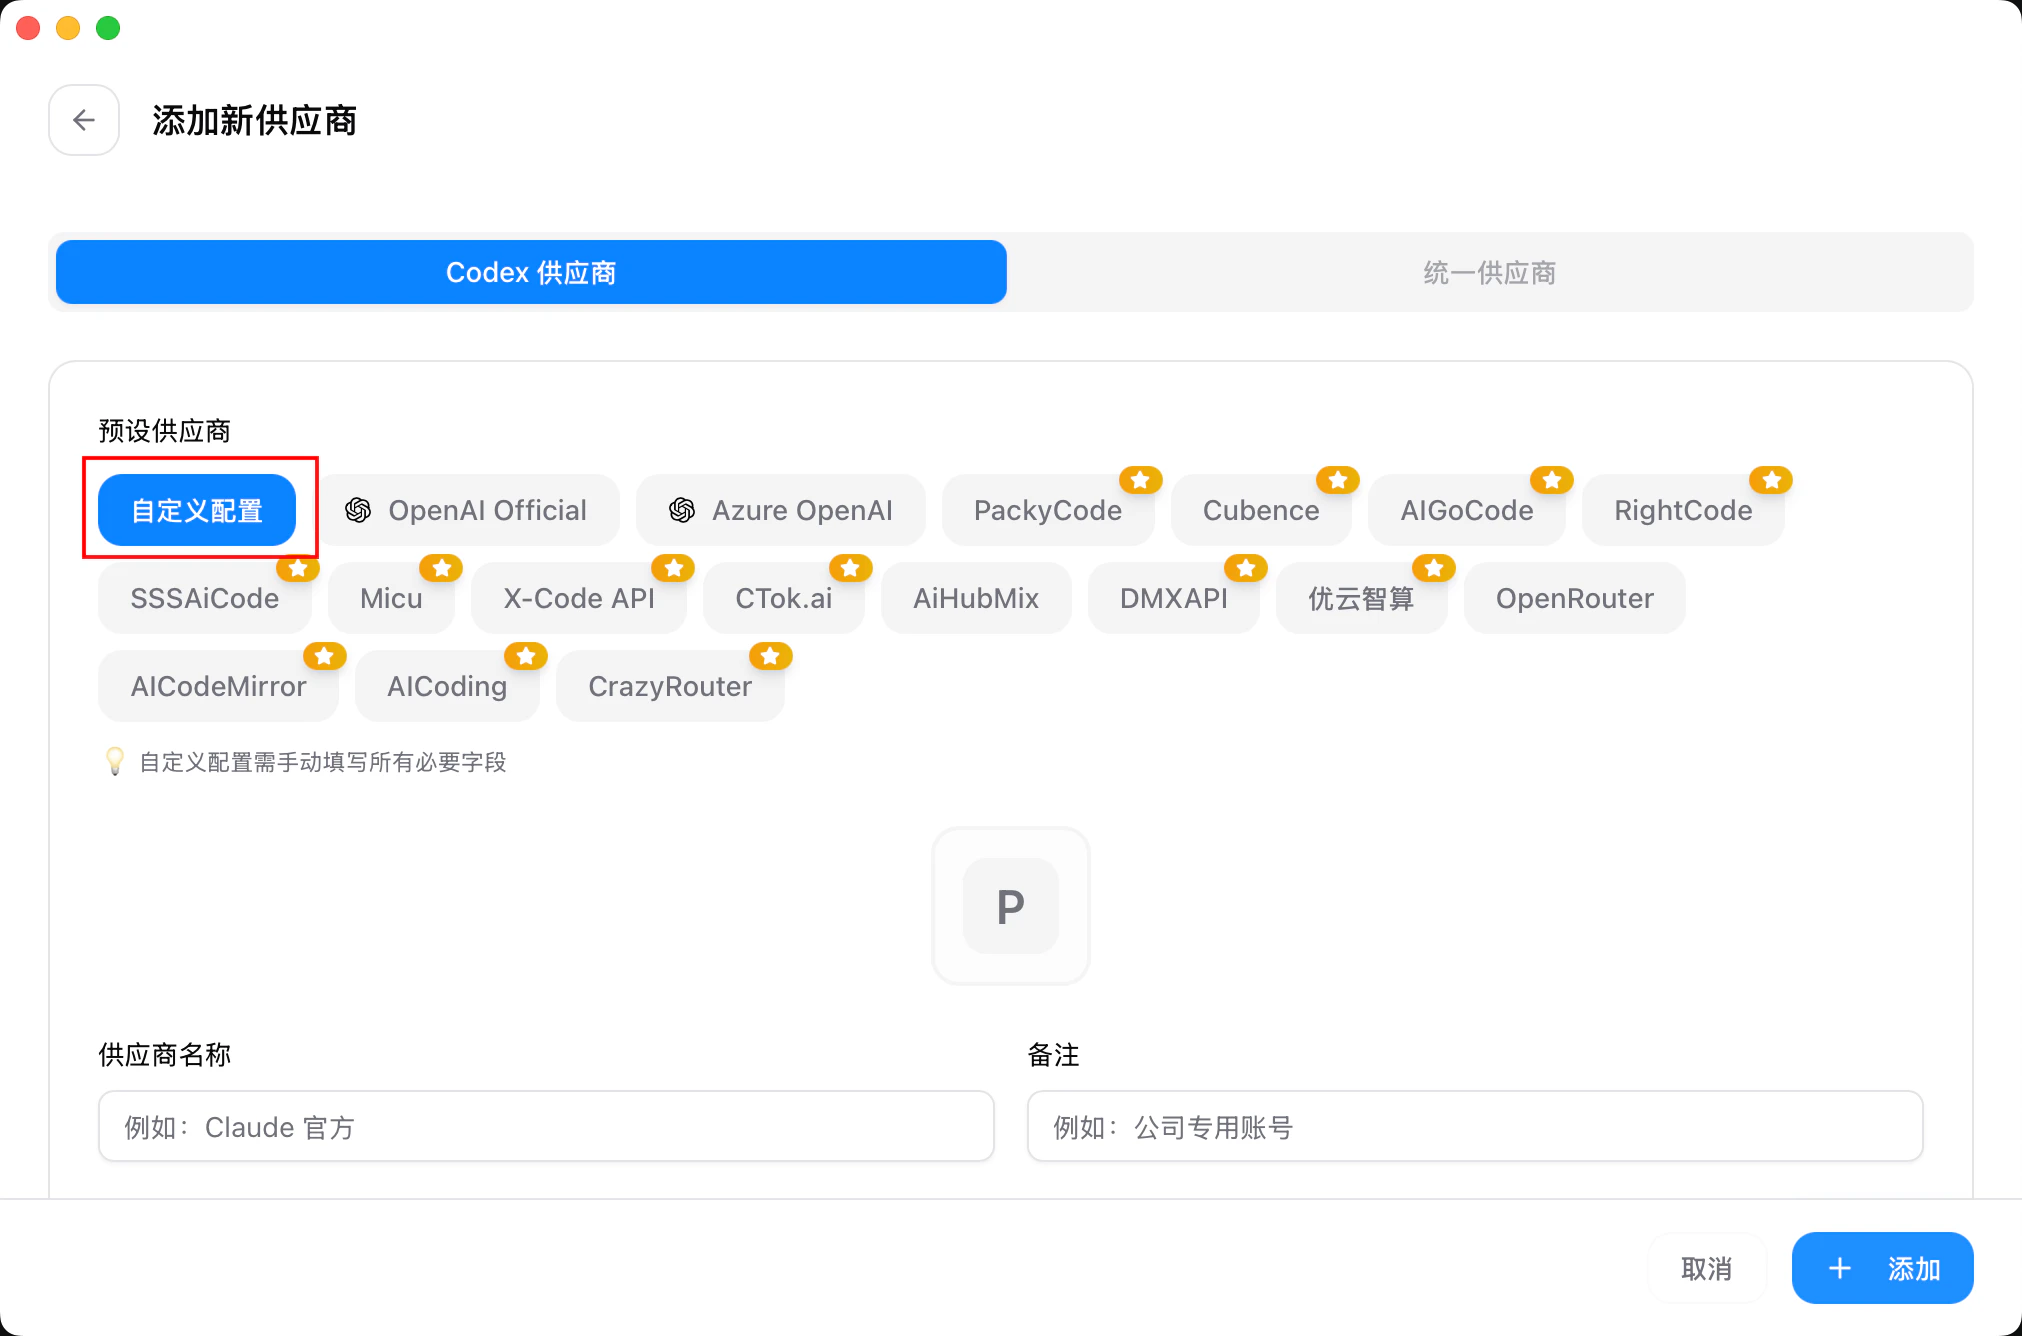 3. 在「API Key」栏中填写你的密钥并点击「添加」保存设置。
 4. 返回首页,在供应商列表中选择「Tokensmind」,点击「启用」即可使用。
 ## 使用 Codex
### 在终端中使用
1. 打开终端,定位到你的项目目录,然后运行 `codex` 命令。
```bash theme={null} theme={null}
cd /你的项目路径
codex
```
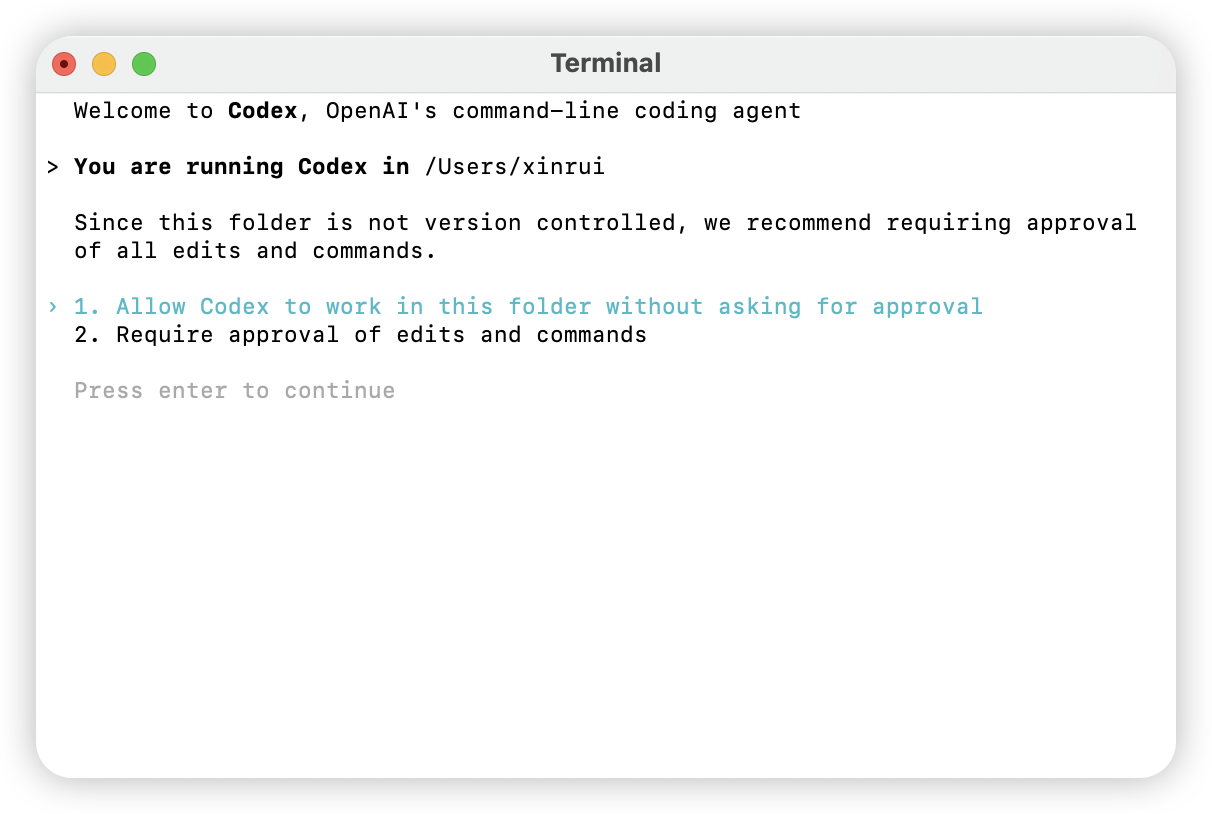
2. 根据需求,设置权限。
## 使用 Codex
### 在终端中使用
1. 打开终端,定位到你的项目目录,然后运行 `codex` 命令。
```bash theme={null} theme={null}
cd /你的项目路径
codex
```
2. 根据需求,设置权限。
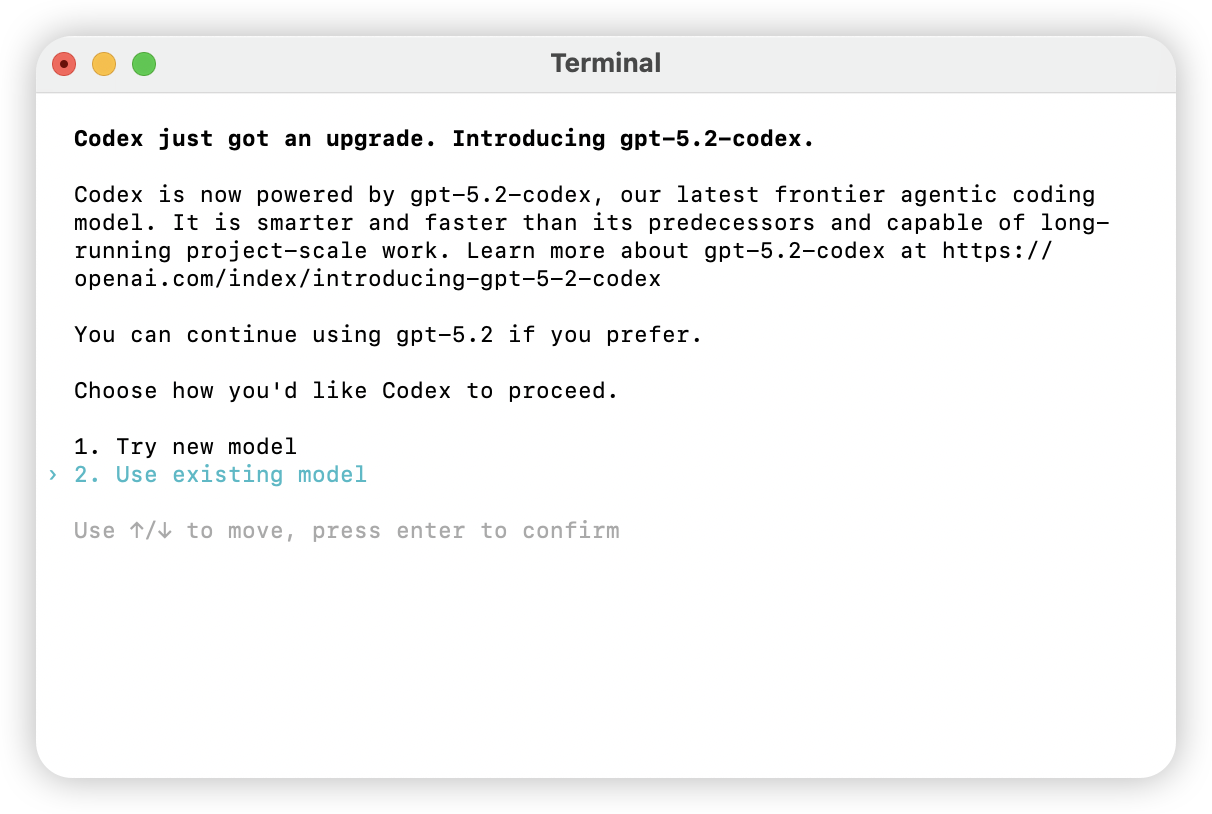
 3. 根据需求,选择需要使用的模型。
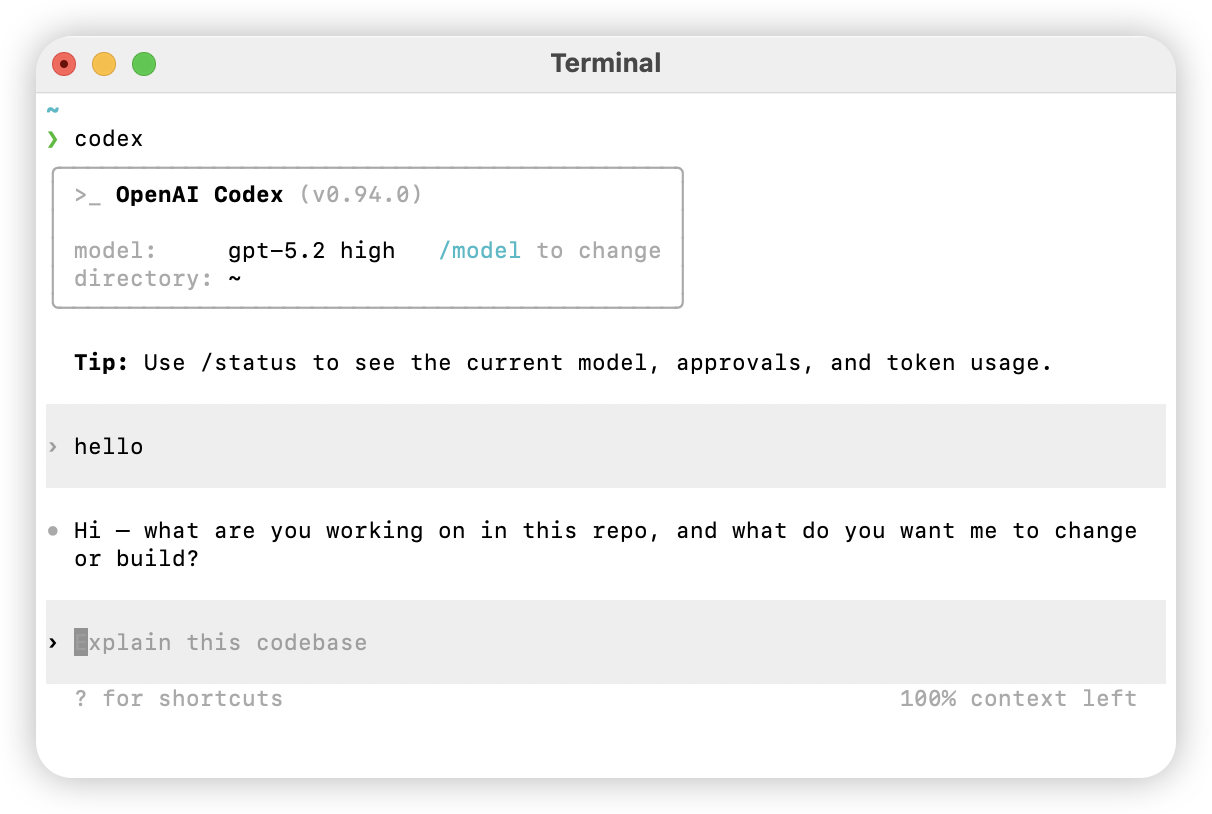
 4. 输入自然语言,若正常响应,则配置成功。
 ### 在 Codex 桌面端使用
1. 打开 Codex 桌面端,选择工作目录。
2. 在输入框输入任务,若正常响应,则配置成功。
### 在 Codex 桌面端使用
1. 打开 Codex 桌面端,选择工作目录。
2. 在输入框输入任务,若正常响应,则配置成功。
 ## 实用命令参考
### 帮助命令
```bash theme={null} theme={null}
codex -h
```
### 完整命令选项
```bash theme={null} theme={null}
Usage
$ codex [options]
Options
-h, --help 显示帮助信息并退出
-m, --model 指定使用的模型 (默认: codex-mini-latest)
-i, --image 包含图像输入的文件路径
-v, --view 查看之前保存的会话记录
-q, --quiet 非交互模式,仅打印助手的最终输出
-a, --approval-mode 覆盖审批策略: 'suggest', 'auto-edit', 或 'full-auto'
--auto-edit 自动批准文件编辑;仍会提示确认命令
--full-auto 自动批准沙箱环境中的编辑和命令
--no-project-doc 不自动包含仓库中的 'codex.md' 文件
--project-doc 包含指定的 Markdown 文件作为上下文
--full-stdout 不截断命令输出的 stdout/stderr
危险选项
--dangerously-auto-approve-everything
跳过所有确认提示并直接执行命令(无沙箱保护)
仅用于临时本地测试环境
实验性选项
-f, --full-context 以"完整上下文"模式启动,将整个仓库加载到上下文中
并在一次操作中应用批量编辑
仅兼容 --model 参数
示例
$ codex "编写并运行一个打印 ASCII 艺术的 Python 程序"
$ codex -q "修复构建问题"
```
## 实用命令参考
### 帮助命令
```bash theme={null} theme={null}
codex -h
```
### 完整命令选项
```bash theme={null} theme={null}
Usage
$ codex [options]
Options
-h, --help 显示帮助信息并退出
-m, --model 指定使用的模型 (默认: codex-mini-latest)
-i, --image 包含图像输入的文件路径
-v, --view 查看之前保存的会话记录
-q, --quiet 非交互模式,仅打印助手的最终输出
-a, --approval-mode 覆盖审批策略: 'suggest', 'auto-edit', 或 'full-auto'
--auto-edit 自动批准文件编辑;仍会提示确认命令
--full-auto 自动批准沙箱环境中的编辑和命令
--no-project-doc 不自动包含仓库中的 'codex.md' 文件
--project-doc 包含指定的 Markdown 文件作为上下文
--full-stdout 不截断命令输出的 stdout/stderr
危险选项
--dangerously-auto-approve-everything
跳过所有确认提示并直接执行命令(无沙箱保护)
仅用于临时本地测试环境
实验性选项
-f, --full-context 以"完整上下文"模式启动,将整个仓库加载到上下文中
并在一次操作中应用批量编辑
仅兼容 --model 参数
示例
$ codex "编写并运行一个打印 ASCII 艺术的 Python 程序"
$ codex -q "修复构建问题"
```